So, you want to record great sounding vocals but money’s tight? Well, you don’t have to scrimp and save for the next five years to build your dream audio booth. In just a few hours to a few days you can set up a great audio booth without breaking the bank! Here’s how…
The Booth
First, you need a booth. Where can you get a booth? You can buy a pre-built audio booth for a few thousand dollars, or build one for a few hundred, but you’re a broke musician so let’s do something cheap. Use a closet! Surely you have a rarely used closet in your house you can clear out or at least make room in. A closet is the perfect size for an audio booth because it’s small, making it easy to treat acoustically. In fact, if you set up your booth in your clothes closet, it may be treated already! A closet with lots of hanging clothes makes a great audio booth almost instantly, although you can always improve upon that.
Cost: FREE (assuming you have a closet!)
Treatment
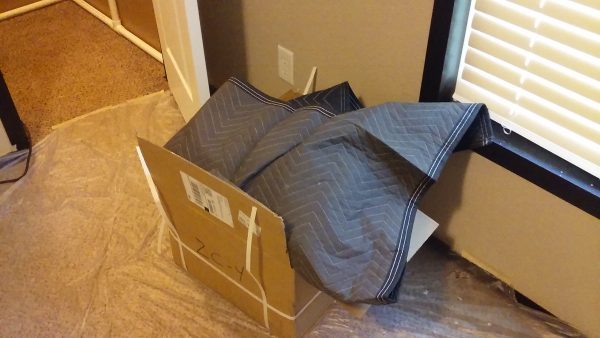
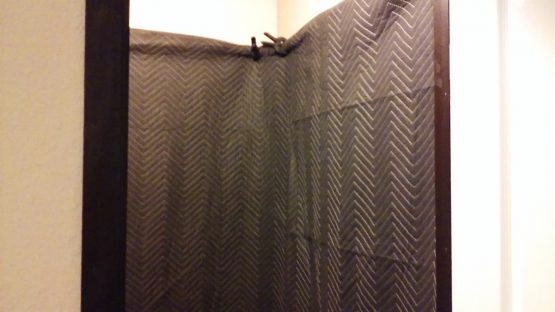
Even with a closet stocked with clothes you may want to add additional treatment to it. What does treatment do? Treatment “deadens” the room so there’s no echo and allows your microphone to capture a purer recording of your voice. If your closet is empty you’ll definitely need to add treatment to it. You could purchase acoustic paneling and apply it to the walls, but this can get expensive. A cheaper option is to buy thick moving blankets. They are very affordable and usually come in packs of 10 or more. Simply hang these up on your walls and you’re good to go.
A few optional ideas: 1) You may want to also hang a moving blanket above you, either by attaching it to the ceiling or with framework. 2) Speaking of framework, one thing you can do if you live in an apartment or simply don’t want to hang anything directly off your walls is to make an interior framework out of PVC pipe. PVC pipe is cheap and very easy to work with. This not only gives you something to hang your moving blankets from, but it can easily be disassembled and moved to another location if needed.
Cost: ($60 – $100)
Technology
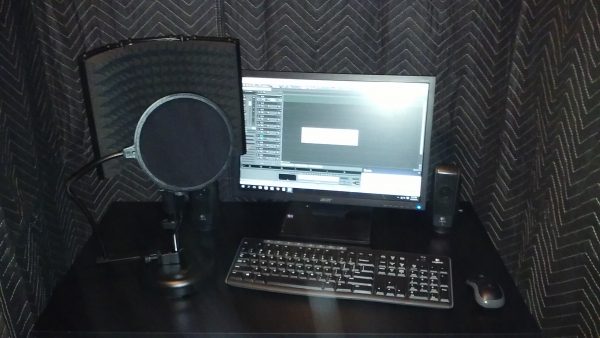
You want to keep any noisy technology out of your audio booth. I’m looking at your noisy computer fan! The best way to do this is to leave your computer outside the audio booth but have it connected to a monitor and microphone inside the audio booth. You can then use a wireless keyboard and mouse in the booth to operate it.
Of course, you also need a microphone if you don’t already have one. While you can certainly find very good microphones that cost thousands of dollars, you can also find very good microphones that only cost a few hundred. You will typically want to get a side-address condenser microphone. You have two options:
USB Microphone. This is exactly what it sounds like. It’s a condenser microphone that plugs directly into your computer via USB. These can range in price form $100 – $300.
XLR Microphone. This is a more “professional” option and allegedly captures a truer sound. The downside is that you can’t plug this type of microphone directly into your computer. To use an XLR microphone you will need to also purchase an audio interface. Like a USB microphone, XLR microphones can range from $100 – $300. Audio interfaces can cost about the same.
Good news! You can almost always find a great deal on used microphones and audio interfaces on Ebay!
Cost: $75 – $300 depending on needs. This assumes you already have a computer, of course.
Now, with only a few bucks spent, you really have something to sing about and a great, affordable audio booth to record yourself in! Don’t let a dusty wallet keep you from capturing a great vocal recording!
This article was brought to you by Afford A Voice. Afford A Voice is a voice over marketplace where clients can search a large database of professional male and female voice talents and get quick reads at amazing rates. Let us do the talkin’!